Why should you invest time in learning how to increase blog traffic?
Well, imagine this: you toiled away for months to start your blog. You agonized over the name, carefully picked a theme, wrote your best copy, and launched it with all the giddiness of a high schooler asking their crush to prom. And then—crickets.
Your blog is a ghost town. Tumbleweeds would roll down your homepage if they could. Not a single soul seems interested in your content.
In a panic, you try your best to fix the situation. You ask your friends and family to search for your blog’s name and click it to let Google know it exists. You even consider printing business cards with its URL and handing them out on the street. Maybe a different theme would help?
Doubts creep in. Perhaps blogging simply isn’t for you after all. Perhaps you were kidding yourself, and maybe what you have to share isn’t that interesting after all. And you start to consider giving up.
This is the last situation we want you to find yourself in. That’s why, in this blog post, we have put together a list of proven tactics and tips you can use to generate traffic to your blog. You can start implementing them right now, and doing even just a few of them can make a big difference.
Ready to give it a go? Then let’s not wait any longer.
How to get more blog traffic from SEO
Search engine optimization, or SEO, is the basis of traffic generation for most blogs. That’s because it’s mostly free to implement and pretty much “set it and forget it.” Once you have a good foundation, it works with relatively little maintenance. But how do you get it right in the first place?
1. Conduct keyword research
If you’re reading this article, you want to generate more traffic with your blog. Blogs that receive a lot of visitors are ones that are full of helpful content about topics that people search for and want to read.
A blog post can be the best-formatted, wittiest, and most thoroughly-researched piece of writing ever, but if the topic isn’t something that others are interested in, it likely won’t deliver the traffic returns on it.
Keyword research helps you avoid that by ensuring you pick subjects your audience is actually interested in. That way, you don’t end up figuratively yelling into a vacuum. It also helps you discover new blog post ideas.
Evergreen content consists of blog posts that remain perpetually relevant and can drive traffic year-round. They contain information that doesn’t change or changes very slowly.
For example, “weight loss” is an evergreen topic. People are always looking for ways to slim down, and the principles (diet and exercise) stay mostly the same.
On the other hand, the results of the 2024 Olympic games are probably not a popular search topic beyond a certain point in time.
There’s also seasonal content. It can be evergreen for the same period every year, but it likely won’t bring in lots of traffic outside of a particular timeframe.
The perfect example for a seasonal search term.
In conclusion, make sure that at least part of your content strategy includes evergreen content. MailChimp has a guide on this topic with additional details.
3. Follow Google’s E-E-A-T guidelines
The acronym E-E-A-T stands for Experience, Expertise, Authoritativeness, and Trustworthiness. It’s not a direct ranking factor (i.e. something that formally impacts your content’s ability to rank) but a concept Google introduced to gauge the quality of web pages that appear in its search results. Therefore, if you want to increase traffic, you’d do best to demonstrate these aspects on your blog.
Here’s how you can do so:
Experience: Show that you have firsthand experience in your subject. For instance, if you’re talking about a product, actually use it. If you’re recommending a hotel or location, visit it.
Expertise: Create high-quality, in-depth content and link to reputable studies, data, or industry leaders to back up your claims. Highlight relevant credentials or qualifications on your About page or author bio.
Authoritativeness: Consistently publish top-notch articles to build authority in your industry, attract backlinks and mentions, and grow your reputation.
Trustworthiness: Ensure your website is trustworthy through security, transparency, and being ethical. For example, disclose affiliations or sponsorships clearly and provide easy ways to get in contact.
This isn’t a hard-and-fast rule though. In the end, your blogging frequency depends on your goals, the length and type of your content, and the time you can invest.
To get on the right schedule for yourself:
Ask your audience.
Experiment with different posting frequencies.
Find a cadence you can sustain.
Focus on quality over quantity.
6. Avoid duplicate content
Duplicate content means two pages that contain exactly the same or almost identical material. This can confuse search engines about which of your pages to rank for a particular keyword.
Here’s how to avoid it:
If you reuse the same content somewhere else, include a canonical tag to the original so that search engines know which is the most representative of the topic.
Add descriptions to your category pages. It will distinguish them from other archive pages that might contain the same blog posts.
Switch off irrelevant archives, like tags, to decrease the likelihood of several archive pages displaying the same content.
Don’t paginate your blog comments. Pagination creates additional versions of your blog posts with the same content except for the comment section.
Use tools like Siteliner and Copyscape to find duplicate content so you can fix it.
Internal links (or links to your other content from your own content) serve numerous purposes:
They allow visitors to discover more relevant pages and keep them engaged.
They establish relationships between your pages, helping search engines understand their context and how they fit together.
They distribute SEO value from incoming links across your site.
Therefore, when you create content, it’s recommended that you always link to related, relevant pages and posts on your blog. In addition, make sure to use clear anchor text, meaning the text that appears as the link on the page. Visitors should easily be able to understand what page they’ll land on when they click.
For detailed guidance on internal linking, check out this post on Yoast.
8. Use an SEO plugin
SEO plugins are helpful because they support you in optimizing your blog to increase organic search traffic. They give you lots of control over how your content appears in search results and often implement improvements automatically.
Take advantage of this possibility for every post and page to make sure your titles and descriptions grab reader attention in search results and aren’t too long.
In addition, SEO plugins often come with content analysis options. Input your page’s main keyword, and they will tell you if you’re using it often enough, in the right places, and other ways to optimize the page.
Links to your blog from other sources, called backlinks, are one of the main signals search engines use to determine where to rank your content. However, it’s not about the raw numbers; the quality of backlinks, meaning if they come from relevant and trustworthy websites, makes a huge impact (so don’t start buying backlinks).
The truth is, intentionally building backlinks isn’t easy. Here are a few practical ideas you can try:
Create linkable assets: Make your content so good that people naturally feel inclined to link to it.
Do outreach: Contact influencers and blogs in your niche or industry, and let them know about content they might find useful.
Up-to-date information is a sign of quality content. That’s why blog posts tend to drop off in search rankings over time. The antidote? Refresh your content regularly.
Here’s how to improve older content on your blog:
Tailor posts more strongly to search intent, meaning make sure you’re answering the purpose of a reader’s search fully.
Website speed is a major factor in user experience, so much so that Google has adopted it as a ranking factor. Therefore, if you want to do well in search results, make sure your blog loads fast.
If you host your blog on WordPress.com, you already have a leg up on this. Optimized and scalable servers, built-in caching, fast themes, and a content delivery network are included with every plan. These features ensure your website is blazing fast.
However, there are also speed factors you need to take care of on your end, such as:
Optimizing images.
Keeping the number of plugins on your site to a minimum.
Structured data is what you see in search results when content displays images, ratings, prep time, and other additional information, known as rich snippets.
While using structured data won’t automatically make your content rank higher, it can help because search engines can better understand your site content with it. It’s also an effective way to increase click-through rates, which are a positive signal for search engines as well. It shows that your content is relevant to their users’ search intent.
Structured data exists for different types of content, from recipes to reviews, and can add different features to your content. One example are the handy, styled recipe cards you often see in food blog posts.
You can hard-code structured data, but the easiest way to incorporate it into your content is to use one of the many plugin solutions for structured data.
Most SEO plugins also include options to assign structured data to your content. Once you have set up the markup on your site, use Google’s Rich Results Test to make sure it works correctly.
It makes sense, as most people guard their personal email address fiercely. Therefore, if they like your content enough to hand over their address for your newsletter, you’ve found someone who is likely to return.
In addition, your email list belongs to you. It can’t be taken away, and nobody can limit your reach the way a social media algorithm upgrade can.
For that reason, building an email list you can use to increase blog traffic should be an absolute priority.
13. Add email subscription options to your blog
The first step in building a newsletter audience is to equip your website with a way for people to sign up. On WordPress.com, you have that ability out of the box.
All you need to do is go to Settings > Newsletter (or Jetpack >Settings > Newsletter on plugin-eligible plans) and enable ways for people to sign up.
You can also manually add sign-up options with the Subscribe block. Once you have subscribers, you have the possibility to automatically send new content to them.
The Newsletter menu lets you customize the look of your emails, set up a paid newsletter, and compose a welcome message. You can have unlimited email subscribers, import them from other platforms, monitor open and click rates, and much more.
14. Encourage email subscribers to share your posts
Your email subscribers are already engaged with your content, making them ideal advocates for your blog. You can leverage that to increase blog traffic by encouraging them to share your posts, like so:
Make it easy to spread the word: Add links that allow subscribers to share your posts on social platforms.
Encourage subscribers to forward your emails: Use friendly language like, “Know someone who’d love this? Forward it to them!”
Offer incentives: Provide free resources, discounts, or entries into a giveaway for each share.
Feature your most engaging or useful posts: Highlight these in your newsletter and ask readers to share their favorites.
Every little bit helps. When you notice someone sharing, be sure to express your gratitude.
15. Reach out to other bloggers
Collaborating with other bloggers who have an established audience can help boost your blog traffic. It exposes your content to more people already interested in your niche.
Here’s how to pull it off:
Identify relevant bloggers in your niche or complementary niches with active email newsletters.
Build rapport by commenting on their blog posts, sharing their articles on social media, or mentioning them on your own blog.
Craft a personalized pitch, mentioning specifically how your content can add value to their audience.
Highlight mutual benefits, such as featuring their work on your blog, promoting their newsletter, or providing content their readers would appreciate.
Share your most polished and valuable posts for consideration that resonates with their audience and aligns with their standards.
Alternatively, ask them to write a blog post on your blog (with a backlink) or interview them and then ask to share the interview with their audience.
Get blog traffic from social media
Social media is an established and important marketing channel. Here are ways to use it to increase the traffic to your blog.
16. Regularly share your posts on social networks
You probably don’t need an introduction to how sharing on social media platforms works. Any blog promotion plan should include regularly publishing your content there.
An important question is which platform(s) you should choose. This depends on a number of factors. For example, if your content includes stunning visuals, like a travel blog, a platform like Pinterest or Instagram might be a good option.
For written content that you can break down into bite-sized facts, LinkedIn and similar platforms come to mind.
One that deserves special mention is Bluesky. It’s particularly friendly to bloggers since it doesn’t suppress links, and you can customize your Bluesky handle with a custom domain from WordPress.com. Other popular networks like Facebook and X try to keep users on their own site, making it more difficult to use them for traffic generation.
Take the time to learn each platform’s rules and conventions, and focus on a maximum of two or three at first. You can always branch out later.
By the way, in WordPress.com, you can auto-post your content via Jetpack Social. Just go to Tools > Marketing > Connections and connect your blog to your accounts.
After that, you can choose to automatically share posts when you publish them.
17. Add social sharing buttons/blocks to your blog
Including social sharing options in your content allows visitors to easily post it on social media. They are also easy to set up and configure on your WordPress.com blog.
If you’re using a legacy theme, go to Tools > Marketing > Sharing Buttons. Determine where buttons should appear and what the buttons should look like.
If you’re using a block theme, you can take advantage of the Sharing Buttons block instead. It allows you to display buttons wherever you want with many ways to customize them to your needs.
18. Create a link-in-bio page
A link-in-bio page is where you consolidate links to all of your web presences and most important pages.
It’s a great place to include your blog in order to direct social visitors there. In addition, it’s easy to create, thanks to w.link, which fully integrates with WordPress.com and is customizable.
Finally, here are a few more tips on increasing blog traffic that didn’t fit in the other categories:
19. Use analytics to inform your content strategy
Analytics tools help you understand what resonates with your audience. By identifying content that performs well, you can create more of what attracts your readers.
Identify which topics receive the most views, likes, and comments to create more content on similar themes or expand on related subtopics.
Check the search terms people use to find your blog to reveal what information your audience is actively seeking.
See which sources refer traffic to you to focus on platforms that drive the most visitors.
Look at which formats (e.g., listicles, how-to guides, case studies) generate the most engagement and create similar content.
20. Minimize clutter on your blog design
A clean and streamlined blog design helps readers focus on your content. Cluttered designs can be distracting and hurt user experience, making you lose visitors.
While all WordPress.com blog themes feature clean and well-optimized designs, here are additional tips:
Choose a simple theme.
Ensure your blog has enough spacing between elements.
Simplify navigation by grouping similar pages or posts under clear headings.
Use pop-ups sparingly and strategically.
21. Leverage the WordPress.com Reader
The Reader allows WordPress.com users to find content based on their interests from all the sites they follow, including yours.
To make the most of it:
Use relevant tags and categories to increase the visibility of your posts.
Interact with other bloggers by liking, commenting on, and following their posts.
Publish regularly to stay visible to potential readers.
Feature your best-performing posts to attract new readers who explore your blog through the Reader.
For more information on using the Reader, check out the documentation.
Get your blog the traffic it deserves
More blog traffic means a wider reach, a bigger impact, more possibilities, and an increase in the ability to earn money from your blog. If your traffic could be better, don’t panic—there are many things you can do to improve the situation. Pick strategies from above that resonate most with your goals and abilities and build from there.
It looks like you’re here because you want to learn how to create a website, and maybe you find the task ahead a bit scary, overwhelming, and unsettling.
That’s understandable. Making a website can seem like a big undertaking, especially if you’ve been told that you need special skills for it, like knowing how to write code.
We are here to tell you that that’s not true. You can have your own, professional-looking website without any programming skills. In fact, all you need is to know how to use your computer mouse and write on your keyboard.
Sound hard to believe?
Seeing is believing, so in this article, we go over the process of creating your own website using WordPress. We’ll break it down into small, easy steps, so you can follow along even as a beginner.
If you are unsure what the purpose of your site is, doing some competitor analysis is often helpful. You can learn a lot from analyzing other websites in your industry, market, or niche, such as:
If you discover anything interesting or noteworthy, document it so you can borrow inspiration later on.
Choose the type of website you will build
Very different types of websites.
There are many different types of websites and they all come with their own goals, requirements, and differences. Some common kinds of websites include:
Business websites: These sites provide information about a company and its services or products. Sites of this kind usually have an objective such as selling goods or services, lead generation, or newsletter signups.
Personal websites: A personal website lets you establish a profile for potential employers, build your personal brand, consolidate your web presence, or find clients. It comes in many different varieties, from static brochure sites over portfolios to one-page websites.
Blogs: Starting a blog is an excellent way to attract more users to your website (hey, you are here, aren’t you?), show off your expertise, and help your audience. You can also start one to simply practice writing or pursue a hobby. Plus, it can be standalone or part of another type of website (like wordpress.com/blog is the blog for WordPress.com, our WordPress hosting company).
Online stores: The goal of an online store is selling products, goods, or services. This, too, can take many different forms. For example, a shop selling digital products is usually very different from one that deals in real-life merchandise. That’s because you normally don’t need as many product images for digital wares, they typically don’t come in many variations, and they don’t require shipping—all factors that simplify the experience of digital-only online stores.
Newsletter websites: The purpose of a newsletter site is mainly to collect subscribers for an email newsletter. You can grow your email list through popups or subscription forms.
Podcast sites: Another example of a type of site you can build is a podcast website. It can serve as home to your podcast episodes as well as provide additional information around them and you. You can even collect payments for exclusive content and earn money.
Naturally, it’s also possible to combine several website types. For example, you can sell products on your personal blog and send your latest posts via a newsletter. In fact, most websites use a hybrid approach like that. The important thing is to clarify this for yourself so that you work towards the right direction.
Pick your hosting provider and website builder platform
A hosting provider rents out server space where you can place your website files so that others can see your site. A website builder is the software that powers your site. Both influence its management and the end result.
What types of hosting providers exist?
There are different kinds of hosting, but the most common forms are:
Shared hosting: With shared hosting, your website is on the same server as many others, and they all have to share the same resources (hence the name).
VPS hosting: This acronym stands for “Virtual Private Server.” VPS hosting still places your website on the same machine as other sites but everyone gets their own dedicated resources they can’t exceed.
Dedicated server: You may choose to rent and manage your own server solely for your website.
Managed hosting: Like the name suggests, managed hosting providers take many of the day-to-day tasks of keeping a website running off your hands. WordPress.com is a managed hosting provider.
While shared hosting is probably the most common type, the divided server resources can become a speed bottleneck if one or more websites on the shared server start hogging all the processing power. Therefore, it is usually only sufficient for simple sites with little traffic.
VPS and dedicated hosting don’t have this problem; however, they come with additional responsibility. That’s because you only rent the server space; everything else related to site management is up to you. In particular, that means security, speed optimization, backups, infrastructure decisions, and other, similar tasks.
Managed hosting offers the most hands-off approach. For example, when you create a website hosted on WordPress.com, besides making sure your site is fast, secure, and backed up, we also keep it updated, offer top-notch support, and provide an optimized environment.
This arrangement eliminates a lot of busywork for website owners like you. As a result, it allows you to fully focus on the parts of running a website that have the biggest impact on its success and reaching your goals. Examples include content creation, marketing, outreach, and product development.
As mentioned, in this tutorial we’ll show you how to set up your website using WordPress. It’s an open source content management system (CMS) and website builder, which means you can use it to create and manage websites and web content.
In the past, you would have to hand-code HTML and CSS files and upload them to servers to build your site. With WordPress, you can set up a website, change settings, create content, and do everything else from an easy-to-use interface instead.
That’s why it is our website builder of choice here at WordPress.com. Whatever hosting plan you choose (including our free plan), WordPress is automatically included in your account and set up for you. You always land directly on the platform’s user interface—no need to install anything by hand.
WordPress is both powerful and beginner-friendly (as you will see), which is why we, along with more than 43% of all websites on the internet, prefer it. Plus, WordPress is open source, meaning software built and maintained by volunteers and paid contributors who support it for the good of all.
A domain name is the address you type into your browser to access a website. Google.com is a domain name as are wordpress.com and wikipedia.org.
At WordPress.com, we offer many domain extensions for purchase, including .com, .blog, and .org. In addition, with our free hosting plan, you can have a website running on a free subdomain like example.wordpress.com.
While sufficient for getting your feet wet in the website-building game, subdomains like this are not suitable for any professional purposes. It’s like using a Gmail address for your business email; it isn’t as professional or polished as a custom email address is. Thus, if your website is meant to be more than a hobby, you need your own domain name, especially for a business.
Your domain name should be relevant to your site or brand. For example, if you’re building a company site, you may simply want a domain using the company name. It’s where people will naturally assume they can find you.
However, a domain name can also be topical, like gluten-free-gutenberg.com for a food blog with gluten free recipes.
What’s most important is that your address is easy to remember and distinct. While you are at it, it’s also worth checking if the respective social media handles are available to ensure brand consistency.
As for domain endings, due to how common and memorable they are, you can usually go with the .com extension unless you have a good reason not to. One example would be if you operate in a specific area or country. Then, a local domain ending like .de for Germany or .co.uk for the United Kingdom may make the most sense for your intended audience. Specific extensions for certain industries and types of business, like .org, .app, or .ai, also exist.
A second important step is to make sure your desired domain is even available. For that, input it into a domain search tool. It will tell you if you are able to purchase the domain, how much it costs, and alternative ideas if your initial idea is already taken.
Affordable pricing: Standard domain endings are just $12 to $14 per year with hundreds of other options and frequent deals on chosen domains. Most importantly, if you decide to host your website with WordPress.com, you actually get a free domain included for the first year.
Reliability: We’ve been in the domain business for over ten years. Our domains come with free privacy protection, SSL certificates, and a fast and secure DNS infrastructure.
Great customer support: You can reach our domain experts via email and live chat for advice on everything from transferring domains to managing multiple at once.
Finally, having your website and domain hosted with the same provider offers you simplicity. You can manage your domain and site from one dashboard and don’t have to deal with connecting your domain to your hosting account manually.
Pick your WordPress.com theme
WordPress uses “themes” to control the design of your website. They include colors, fonts, layouts, and more—all of the elements that shape the look and feel of a website. You can change themes at will and, as a result, modify your website’s look in literal seconds.
Another benefit is that WordPress themes allow you to affect the appearance of your website without code. You can customize almost any aspect of your theme through an interface without needing to use HTML or CSS.
Same website, same content, but different themes.
What kinds of themes exist?
The good thing about using WordPress as your website builder is that it has themes for pretty much any purpose. No matter what kind of website you want to create, there is likely a suitable theme already out there, complete with specific design elements for the type of site they are created for.
For example, here at WordPress.com, you can find themes for the following website categories:
Blog: These are perfect if you are planning to start blogging. They contain page templates that allow you to easily display and showcase your content. We also have themes for topical categories like travel & lifestyle.
Portfolio: Are you an artist, photographer, or painter? Then, portfolio themes are the perfect tools to show off your work. They are focused on drawing attention to photos, illustrations, and other creative works.
Business: Our business themes aim to help you set up your business site in the easiest way possible. You can also choose from different industries like restaurant websites, real estate, health & wellness, and more.
Store: If you are going the e-commerce route, these themes will give you a leg up in creating your store, offering your products, and attracting customers.
It’s important to note that there are free and premium WordPress themes and that you can find them in a variety of places, including directories on WordPress.org and here on WordPress.com. Note that you need to have a WordPress.com site with a Business plan or above to install third-party themes.
How to install and apply themes
Changing your theme and website design is very easy. You will find the option under Appearance > Themes in the WordPress user interface.
You can filter the list of themes by category at the top or search for specific keywords or theme names. If you see something you like, click on it for additional information.
Try out the style variations and read the theme description. Click Preview & Customize to try out your site in the new design with the option to customize and activate it.
Alternatively, activate your theme from its own page via the Activate this design button. Some themes will automatically change your homepage content, so you have to confirm that you understand that. When you do and look at your site afterward, you can see it in its new look.
Determine the branding and colors you’ll use on your site
Next, it’s time to set guidelines for the content that will populate your pages.
Give your website a voice
Your website content should sound like an extension of yourself or your company. To achieve that, it helps to establish a basic voice for it.
You can do this quickly by following a simple “We are [BLANK], but not [BLANK]” exercise. Here are some examples:
We are lighthearted, but not goofy.
We are funny, but not offensive.
We are helpful, but not bossy.
Of course, if you run your website alone, you can also do this exercise with “I” and “am.” This exercise will help your website sound the way you want it to.
Establish a basic color scheme
If your company already has a visual identity, the website you create should match it. It should be immediately identifiable as your business or brand.
Did you recognize the Google color scheme right away?
Without an established color scheme, you have to create one from scratch.
Don’t have a graphic design background?
No worries, there are only a few things you need to understand here:
Select colors that look good together and convey the emotional sentiment you want visitors to feel. A good starting point is the guide to color psychology from CoSchedule.
Document the hex color codes for your chosen color palette. Color-hex.com makes it easy to find codes that you can copy and paste into website and image design tools (such as WordPress.com). Another option is Coolors, which both helps you create color schemes and gives you the accompanying color codes.
Once you’ve grasped the basics, you can use what you’ve learned about color psychology and hex codes to establish color schemes for other parts of your business.
Put together the visual elements for your site
Common examples of visual elements websites use:
Hero spots and banner images: These will go at the top of your website pages.
Photography: This includes product images, photos of your business, and staff headshots.
Designed images: Think charts, graphs, and infographics.
It’s a good idea to figure out any graphics your site may require before you start building. Some assets you might already have on hand, and others you may need to create.
If your website will need photos (such as images of your business, a portrait of yourself, or maybe a quick snap of your dog), then gather them together now. You can also find more generic images on stock photo sites like Unsplash, Pixabay, Pexels, or Openverse. Just be sure that the image you want to use is copyright-free if you’re getting it from another source.
Should you need designed images (logos, charts, graphs, and so forth), basic design services like Canva, Stencil, or Snappa can help. They make image design easy, especially for featured images, graphs and charts, infographics, etc. Other options include Infogram, Piktochart, and Venngage.
Home Page: The page that visitors land on when they enter your domain into a browser. It can have all types of content, including a blog feed or links to other important pages on your site. Anyone who lands on the homepage should immediately get a good understanding of what your site is about.
About Page: Visitors are usually keen to learn more about the company or people behind sites they like. Consequently, the About page is often one of the most frequented pages on a website, so make sure it’s impactful and clearly communicates who you are.
Contact page: This page is often the next step for visitors after the about page. Your contact page should clearly list all the ways visitors can get in touch or even come with a contact form.
Product and services page: Naturally, if you offer any services or products to purchase on your site, you need pages where visitors can take advantage of that.
Blog: Unless your homepage itself is a blog, you are going to need a separate page to show off your writing. The blog page usually lists articles in chronologically-descending order and also has extra information such as the most popular content and categories. When building a site on WordPress, your blog (like wordpress.com/blog) will be a Page but the individual articles that make up your blog are called Posts.
Legal pages: These days, pretty much all websites need at least a privacy policy. You might also need a Terms & Conditions page and meet other legal requirements.
Consider this list to be a simple starting point. As before, the details depend on the type of website you want to make.
Great ways to determine which pages you’ll need are building a simple sitemap and planning your site structure. A simple spreadsheet or diagram is often enough for that.
Create your website content
When it comes to creating content, the two main questions are the “how” and “what.” You can either write your page content in a separate document and copy it over to your site or create the content right inside WordPress.
Learn how to create pages in WordPress
To make a new page in WordPress, go to Pages > Add New Page in the dashboard.
WordPress.com will automatically propose pre-defined layouts for different kinds of pages that you can choose from.
However, it’s also possible to start with a blank canvas by clicking the Blank page button.
Either way, once you make your selection, you end up in the WordPress block editor.
To start creating your page, enter a title at the top and add your content (like text and photos) below. Page content is created in the form of Blocks, which can be anything from paragraphs and headings to layout elements like columns and even forms and widgets.
Paragraphs are the most simple; they appear as you write and insert line breaks. You can see every other available block when you click the big plus button in the upper left corner or in the editor itself.
Click on any of the block names to add them to the page. Then format and configure them through the settings bar and options in the sidebar.
You can also add more blocks by typing a slash forward (“/”) and searching for the name of a block.
When you publish (by clicking the Publish button in the top-right) or preview (by clicking the computer icon in the top-right) a page, the blocks you added appear as they would for readers of your website.
Before you start writing, determine what information you want to include on your pages. You can do this by drafting simple outlines right inside the WordPress editor.
Each outline should have:
A header or page title.
Subheadings for each page (you can create these using the heading block).
A description of the information each section should include.
Keep it clear and simple. You’ll have time to refine and polish your website copy later on.
Add written material
Unless you have a photography website or similar, your main content is likely going to be words. There are three areas to particularly pay attention to:
Titles
Body copy
Calls to action
Your title matters because it not only appears on your own website but also in search engines.
It’s one of the main elements people use to decide whether or not to click on a link or check out a page. It has to be both informative and alluring, which can be a difficult balance to strike if you haven’t taken the time to plan out your content.
As you might have guessed, body copy appears in the body of the page and contains the main information of each page. This can be a list of your services, your about page, or a blog post.
Here are a few basic writing guidelines that aid in readability:
Keep sentences under 25 words.
Use no more than three sentences per paragraph.
Remember your unique voice.
Write enough copy to cover the needs of each page.
Finally, some pages on your website will have a call to action, which gives your readers an obvious next step. A product page tries to sell, a blog post might encourage readers to comment or join an email list, and a contact page invites visitors to write you a message.
Clearly tell visitors what you would like them to do. You can do it in the form of a heading, button, or simple text. Your pages can also have more than one CTA, the important thing is that they are present and clear.
If you’re struggling to come up with your written content, you can get assistance from the Jetpack AI Assistant on WordPress.com sites. It can craft content for you, propose headlines, check spelling and grammar, adjust the tone, translate content, and more. Check it out! (See, that was a call to action.)
Include images and other visuals
Visual elements help clarify or emphasize points you are making in your writing. They also break up the monotony of large text blocks and generally make online content more pleasant to consume. If you’ve been following along, you should already have your visuals ready.
The most common way to add them to content in WordPress is the WordPress image block. However, you have other options depending on the look you’re after, such as gallery, slideshow, or cover.
You can also include images from the aforementioned Pexels and Openverse right inside the WordPress.com editor. While you create your website pages, click on the block inserter again and then go to the Media tab. Search images by keyword and click them to add them to the editor, complete with the correct attribution.
Consider using videos
Videos are undeniably one of the most popular forms of online content. With WordPress, you can easily embed in your website content. For example, when you copy and paste a YouTube video URL into the editor, WordPress automatically embeds the video where you put the link using the YouTube block.
Automatic embeds like this exist for many other services, including for social media posts.
The WordPress editor also has a number of blocks that allow the use of video, such as a moving background in certain blocks. Finally, you have the option to post animated GIFs (or short videos in image form) as either uploaded images or embedded from somewhere else.
Set up your homepage
To make one of your newly created pages your homepage, go to Settings > Reading in the WordPress.com admin dashboard. At the top, you’ll see two drop-down menus that allow you to define which page serves as your homepage and which one displays your blog posts.
Select your desired (published) page under Your homepage displays and save the settings. That’s it, your homepage is now live!
Add your pages to a menu
Besides your homepage, you want visitors to be able to access the rest of your most important pages. The most common way to do so is with a navigation menu. You can create and modify one under Appearance > Editor in the Site Editor.
The screen you land on looks similar to the block editor used for pages; however, instead of a single page, you can make changes to the entire site layout.
The block that is responsible for navigation menus is itself called Navigation, and you usually already find it in the top section of your theme. Use the Document Overview (it’s a black button with three horizontal lines in the top toolbar) to find it.
Here, you can easily add or subtract menu items, change their order, or modify the entire look of the navigation across all of the pages on your site. All of that happens with the help of the settings bar and menu in the sidebar.
Customize your header and footer
While here, you might as well make changes to your header and footer (if necessary). They are the top and bottom elements of your website, respectively.
You’ve probably already encountered the header element while working on your navigation menu. Besides the menu, it usually contains things like the logo or a search field. Its main functionality is branding and helping people get around your site.
The footer is meant to invite people to stick around longer and explore more options when they reach the end of a page. For that, it commonly includes elements like the copyright notice, extra menus, or your business address.
Your WordPress theme likely already has a header and footer. However, you can try out different options by simply clicking on either element. When you do, additional design options show up in the sidebar.
Click on any of them to insert the block into the editor.
You can also customize them like any other page element. Add layout elements like columns and rows, fill them with menus, social icons, or text. You can also change background and font colors, sizes, and more in the sidebar menu.
WordPress plugins are programs that you can install on your website to add specific features and functionality. They are part of what makes WordPress so customizable; instead of filling the platform with loads of functionality not everyone needs, you can add site features according to your individual requirements.
You can think of them like apps on your phone. Not everyone needs the same banking app that you do, but you can download it to your phone to add that necessary functionality for you.
Plugins can add small tweaks, like the ability to change usernames, or big features, like online store capabilities or entire page builders.
Additionally, there are literally tens of thousands of plugins available. Created by individual developers as well as companies, you can find many of them in the plugin repositories on WordPress.com and WordPress.org, but also third-party stores and on websites of individual developers. Like themes, there are free and paid plugins.
On WordPress.com, you need a site on a Business plan or higher to be able to install plugins. However, all websites on WordPress.com come with two important plugins by default:
Jetpack: Jetpack has features for many important parts of website management like speed, security, and growth.
Akismet: Our anti-spam plugin. It uses artificial intelligence and machine learning to sort the spam comments your site receives from the real deal.
Go to the Plugins menu. Use the search bar to look for what you need by name or keyword, or go through the categories.
When you see something you are interested in, click on it to learn more and then on Install and activate (or Purchase and activate if it’s a paid plugin) to add it to your site.
The plugin will automatically download and become active on your site so you can start using it. You can manage all the plugins on your site as well as deactivate and delete them under Plugins > Installed Plugins.
Popular plugin options
If you don’t know which plugins you should install while you create your website, here are a few popular examples:
Yoast: The most popular WordPress SEO plugin. It allows you to add important information for search engines, such as SEO titles and descriptions. It also has an analysis module where it tells you what you need to do to optimize your pages and much more.
Crowdsignal Forms: This is a plugin that comes pre-installed on WordPress.com sites to help you create contact forms where visitors can get in touch with you. Alternatively, consider using the Form block.
ShortPixel Adaptive Images: Images can be an obstacle to website speed because of their size and longer download time. This plugin helps by converting your visuals to file types with a smaller footprint, compressing them, adding lazy loading, and much more.
MonsterInsights: Easily connect Google Analytics to your website (more on that below) and display website data in your WordPress dashboard. Alternatively, you can enable Google Analytics tracking on WordPress.com without installing a plugin on eligible plans.
In order to attract visitors from search engines, you need to make sure your site is configured in a way that search providers will be able to understand its topic correctly.
With your site running on WordPress, it is automatically search engine-friendly. The CMS is configured in a way by default that makes you content readable and well-structured. Yet, there are still a few things that you can and should do to give your site the last bit of SEO polish.
Write title tags for each page
It’s possible to customize your page titles just for search engines so they are short enough to not be cut off in search results but descriptive enough to entice new visitors to your site.
On WordPress.com, you have the ability to do so via the Jetpack plugin. Go to Jetpack > Settings > Traffic and find the Search engine optimization panel. Here, you can define default title structures for different types of content as well as preview and customize your front page’s appearance in search results and social media.
You can also enable an option to do the same for individual posts and pages.
SEO plugins, like the aforementioned Yoast SEO, also add this and other abilities to your website. For example, both Jetpack and Yoast will automatically create a sitemap for you.
Add meta descriptions
A meta description is another piece of information that appears in search results. It’s the text that you see below the links and URL.
You can configure this with the aforementioned tools, and in general, meta descriptions should be no longer than 160 characters. If no meta description is set, Google will either use the beginning of the post/page or a random passage that it deems relevant.
In fact, it will often do the latter, even if you have included a meta description. However, writing a custom description allows you to control its content for those cases when it does show up.
Use a search-friendly URL structure
The URL is another element that search engines look at when figuring out the topic and ranking of your website. You can configure different link structures for your site in WordPress under Settings > Permalinks.
The most important part is that you show the post name at the end of the URL (also known as the slug). That way, you can include your topic and keywords there. Luckily, WordPress is automatically configured to do so.
You also have the option to display categories in the URL structure. This makes sense if you’re creating a website with an online shop, where grouping products is imperative.
However, it can also be a good idea for content-based sites. It helps further clarify broad topics.
Finally, you have the possibility to include a date in the URL so that people can see when a particular post was first published. This makes the most sense for websites where the date is important to the article context, like news websites.
It’s important to note that unless you have a completely new site, you shouldn’t change your URL structure randomly! It can make you lose search traffic by breaking the links already indexed by Google. This kind of thing needs careful consideration and planning to not ruin your hard work.
Include relevant keywords
Keywords are terms your target audience might use when searching for content like yours. For example, a reader may look up “gluten free pasta salad” to find a new recipe. If you want your pasta salad recipe to rank for that search term, you’ll need to make sure that term (otherwise known as a keyword) appears within your content.
It’s important to put keywords in the title, URL, and meta description. Besides that, you should also include them in your written text, the file names of your images, and their alt text. You can configure the last part in the editor sidebar when you click on any image block.
The information here is used by search spiders and screen readers of people who are visually impaired to figure out the content of an image without being able to see it. Therefore, it is very important for accessibility, not just SEO. It should be a description of what the image is about.
If you are unsure about your use of keywords, many SEO plugins let you enter the keyword you are targeting into the analysis module and give you a checklist if you have used it enough and in the right places.
Generally, you don’t want to overdo keyword usage in your posts or pages, as that can be rather unpleasant to read as a site visitor. Instead, be mindful of the term you’re trying to rank for and use it and variations of it throughout your content in a natural way.
Set up analytics
Web analytics allow you to track website metrics so that you know if you are achieving your goals. They also help you figure out what’s working on your site, if there are technical problems, and which content is popular. Three common tools for this are Google Search Console, Google Analytics, and Jetpack Stats.
Google Search Console
Search Console is what Google calls its webmaster tools. It’s free to use, and you can connect your site to it to find out how your content is performing in search results. It tells you what search queries your content is ranking for, the number of impressions, clicks, and your click-through rate.
This information helps you determine your best-performing pages, find related keywords, and see the countries your content is most popular in. You can also find out what queries individual pages rank for and take action if the performance starts to decrease.
Besides that, Search Console tells you if there are technical problems on your website, and you can find out your indexing status, page experience, Core Web Vitals, and more. This helps you make sure your search performance is not hurt by a technical glitch. You can also submit a sitemap to help Google discover your content.
Google Analytics
Google Analytics is another free Google tool that you can connect to your site. Instead of ranking in search, it reports on traffic from all sources and helps you better understand how visitors interact with your site once they’re there.
The tool shows how many people are on your site, where they come from (both the medium and locality), what content they look at, how they move through your site, where they drop off, how long they stick around, and a lot more. It also lets you track conversions for custom events and shopping activity.
This tool helps website owners understand what pages and content are most popular and how you can improve the experience on your site in order to move visitors towards desired calls to action and pages.
Jetpack Stats
Jetpack Stats is present by default on any website you create on WordPress.com, and you find it in the Stats menu.
The analytics tells you the number of visitors, page views, likes, and comments. You can filter it by different timeframes, see your most popular posts and pages, who refers visitors to you, where they come from in the world, search terms, most clicked links, and a lot more.
Depending on your WordPress.com plan, you may also see the Insights tab that gives you a yearly overview of how much you posted, your visitors per day, the most popular posts, and more.
Finally, there is also information about your WordPress.com subscribers.
Test, publish, and promote your website
Once you have finished all of the above, the final step is to publish your site. But there’s one that comes before it: testing.
Go through every part of your website and make sure it’s the way you want it to be. Test all functionality, proofread content, check your pages on different devices, and run them through a speed tool like the WordPress.com Speed Test.
Once satisfied, publishing your site usually means switching it from private to public in Settings > General. Make sure to disable the setting that discourages search engines from indexing your site.
After that, it’s publicly available and ready to welcome visitors. However, you have to take an active role in bringing them to your site. Here’s how:
SEO: We have already covered how to optimize content to rank well in search. To let search engines know that your site exists, make sure to submit your sitemap to webmaster tools like Google Search Console. That way, they can index your pages and show them in search results.
Social: Use social media to promote your website and potential blog posts. Write updates, use appropriate hashtags, and interact with others in your industry.
Email: Starting an email newsletter is an effective way to build a loyal following. You can email them about new content and other news.
Jetpack, which comes with every WordPress.com website, has a number of useful features for this. For example, under Tools > Marketing you can connect to your social accounts and have the plugin automatically post new site content to them.
Likewise, under Settings > Newsletter (or Jetpack > Settings > Newsletter on eligible plans), you can add email newsletter functionality to your site and configure where sign-up boxes appear.
Plus, you can use the Subscribe block to add more options manually. Once set up, you have the ability to automatically send new posts to anyone who signs up to your newsletter.
Maintain your website
Running a website means playing the long game, and it takes consistent effort to make it successful. Two of the most important matters to keep in mind are backups and content updates.
Without a backup solution in place for your website, you could lose everything you worked so hard to create. In addition, if you let your content go stale, it can lead to loss of search rankings and a bad user experience.
If your site is hosted at WordPress.com, the first part is taken care of for you. All sites on Business plans and above are automatically backed up at least once a day and give you the ability to restore them to any previous point in time.
That’s the beautiful part about managed hosting; it leaves you time and space for non-admin work. Time that you should invest in keeping your content updated. At least once a month, make sure to look over your most important pages to see if the information is still current, especially crucial information like your business hours or address.
Besides that, if you are running a blog, you should also regularly update your articles. Google Search Console and other SEO tools can tell you if your rankings start worsening. If you see rankings start to go down, that’s definitely a cue that your content might need an update.
Frequently Asked Quetions
Finally, let’s go over some FAQs about creating a website.
Do I need to learn how to code?
No, absolutely not. WordPress is set up as a beginner-friendly, no-code solution. Thanks to its powerful block editor, you can make almost any change you want through its visual interface.
If you do know how to code, you do have the ability to use it on your site. However, it is never a requirement.
How long should it take to build my website?
There is no cut-and-dry answer to this. It will depend on the type of website you’d like to build, your level of expertise, how much time you are able to commit to it, and more.
Generally speaking, you can start a basic website with WordPress.com in a weekend. As you have seen above, it’s enough to simply slap on a design, create pages and content, and put it out there. If you need something more elaborate, it will, of course, take longer.
How much should I pay for a website?
Just like time invested, website costs are variable and depend on your needs. Two of the most basic costs are your domain and your hosting plan. These are easy to figure out.
However, there are other costs involved with building and running a website, such as from buying premium themes, plugins, or tools. Yet, as mentioned, a lot of that is optional, and you can forgo some of the bells and whistles to make the process more affordable.
It’s important to note that with a WordPress.com plan, you get a lot of value for your money. They include many features you often would have to pay a separate service or plugin for, especially when it comes to website speed and security.
Why is WordPress.com the best choice for my hosting/website builder?
Customer support: Access to 24/7 expert support, ensuring you get help whenever you need it.
Security: Automatic updates, daily backups, and built-in security measures protect your site from malware and hacking attempts.
Built-in Jetpack features: Essential tools like site stats, social sharing, downtime monitoring, and basic SEO are built-in, improving your site’s performance and reach.
Speed: WordPress.com’s global Content Delivery Network (CDN) and optimized infrastructure ensure fast load times for visitors worldwide.
No limits on traffic: We handle any amount of traffic without you needing to worry about bandwidth limits, extra costs, or a decrease in site performance.
Open source-driven: Because WordPress.com is hosting made for the open source WordPress software, you have the flexibility and freedom to customize your site (unlike other proprietary solutions).
Themes and plugins (on the Business plan and above): Unlock thousands of premium themes and plugins for advanced customization and added functionality to match your unique needs.
Create your website with WordPress today
Lack of development and technical skills shouldn’t keep you from setting up your own website. Even as a beginner, you can follow the steps above to create your presence on the internet.
While it might be a bit outside of your comfort zone, it’s absolutely doable. All it takes is a willingness to try, learn, and persevere. With that, you too can create a website for yourself. Know what you want to achieve, then set out to do it one step at a time.
We’d be honored to be along for the ride. Sign up to WordPress.com today and take advantage of the convenience of WordPress-optimized managed hosting, powerful tools, and expert support. Whether you’re starting a personal blog, launching a business site, or opening an online store, everything you need is within reach.
So, you want to start a blog, huh? First of all, that’s a pretty dope idea. In my opinion, it’s one of the most fun and rewarding things you can do.
Blogging allows you to dive deeply into topics that really interest you, improve as a writer, and learn a ton along the way. In addition, starting your own blog has never been easier. The required pieces are readily available. You just have to know how to use them, which is what this post will show you.
We’ll cover the step-by-step process on how you can start a blog basically today. From if and why you should do it, over preparation, getting a website address, setting up and designing your blog, to writing your first blog post and making it ready for publishing.
But wait, isn’t blogging dead?
If blogging had really died as often as people said it did, it would have signed a DNR by now.
But, the truth is, blogging has never really gone away. It has changed over time, for sure, but is still a valid way to attract an audience, drive traffic to your website, and even build a business around.
77% of participants say they see results from blogging, 20% even say strong results
65% use it as a tool to drive SEO traffic to their websites
Yes, they also say it takes more effort to craft blog posts. Participants see the best results when they spend 4-6+ hours per in-depth blog post. But blogging is alive and well.
Okay, so why should you start a blog?
Starting a blog lets you write about and explore anything you want. Whatever your interest or passion, it’s an outlet to curate your knowledge and ideas.
In addition, it’s great writing practice and great thinking practice too. It forces you to properly structure your ideas. Plus, it really helps with learning because, in order to explain something to others, you first need to understand it yourself.
In addition, being creative is simply fun and meaningful. Sharing what you know with others in the hopes of helping, inspiring, and educating them is rewarding.
What’s more, it can actually be a vehicle to build an audience, establish authority in your industry, and position yourself as an expert. And who knows, over time, your blog might turn into a side or even main business. You wouldn’t be the first blogger to start earning money from sharing your knowledge.
Most importantly, a blog is your own presence on the web where you can decide what happens and how. And, especially if you create it with a system like WordPress, you fully own it.
That’s different from, say, a presence on social media, where you can:
Get banned for violating the terms and conditions, even accidentally
Lose your reach due to an algorithm change
Be forced to migrate because you don’t support the new ownership
When you don’t own your outlet, you are at the mercy of those who do.
How to start a blog with WordPress.com in 12 steps
Feel motivated yet? Good, then let’s put that energy to good use.
1. Choose a niche and determine what you’ll write about
When considering your blog topic and niche, there are three fundamental factors to think about:
Your interest – It’s hard to start a successful blog and stay motivated to write about something day in and day out that you aren’t really into, even if it’s a popular topic. So, choose something you actually care about, it will also show in your writing.
Monetization – Some niches are more suitable for building a business around than others. If that’s your goal, it helps to do some research beforehand. For example, you may check if there are affiliate programs you could sign up for. A simple Google search like “[your topic] affiliate program” is often enough. Other ways to monetize a blog are Patreon and Ko-fi. On WordPress.com you can also accept donations and run ads on your blog.
It’s also important to niche down. Start with broader topics like personal finance, cooking, or travel. From there, dig further, for example:
Investing for millennials
High-protein meal prep ideas
Solo travel for women
You can always broaden your topic later but for the beginning, going small helps you focus.
2. Brainstorm a name for your blog and secure your domain
In naming your blog, you can go different routes. For example, you could use your own name like author James Clear.
This emphasizes who is behind the writing even if it doesn’t give away the blog’s topic yet. You can also use a business name instead of your personal name.
Another choice is to give the blog a title that conveys its topic, similar to Nerd Fitness.
A third option is to do a mix. For example, Chris Guillebeau uses his own name for the domain but his blog is called “The Art of Non-Conformity”
Generally, your blog name should be clear, easy to remember, and unique. This also matters for your choice of domain name. You want to use one that’s the same as the blog name or at least intimately tied to it.
Hosting allows you to make your blog available for people surfing the Internet. With WordPress, you are free to choose where to host your blog.
Using a managed hosting provider like WordPress.com allows you to outsource many of the more technical tasks of starting a blog, like:
Installation – You can skip uploading the files to a server, creating a database, or running the installation yourself.
Speed optimization – WordPress.com’s servers are optimized for WordPress and offer other speed features.
Security – You get daily security scans, automatic backups, brute-force protection, downtime monitoring, encryption, firewalls, DDoS protection, automatic software updates, and more with every plan. Don’t worry if you don’t know what half of this means. The bottom line is simply that your blog is super secure from being hacked.
All of the above allows you to fully concentrate on content creation and growing your blog. Simply choose a WordPress.com plan to get started.
Each plan comes with unlimited visitors, posts, and pages. You can even start with the Free plan and upgrade later, such as when you want to extend your blog’s functionality with plugins on the Business plan. Plus, if you go for the yearly option, every plan also includes a free domain for one year.
4. Select a WordPress blog theme
Themes control the design of a WordPress blog. Switching from one theme to another can make a huge difference in the look and feel of your blog. There are plenty of blog themes with design and layout elements specifically for blogging, making it easy to start. They even exist for different subjects like food, travel, etc.
To install one, log in to your WordPress blog, go to Appearance > Themes, and click the Blog category at the top.
Click on any theme you like for additional information and also to try out any style variations it comes with.
You can apply it to your blog right then and there by clicking Activate this design. Alternatively, click Preview & Customize to view your current website in the new skin and make adjustments before activating it.
5. Add pages
At this point, you might want to jump straight into customizing your theme design and we’ll get to that. But, in order to do so, it helps to first get familiar with the basic workflow of how to edit content in WordPress.
A good way to ease yourself into it is to create pages. It uses a lot of the same principles but is less complex and, therefore, a good starting point.
You create a new page by going to Pages > Add New Page in your WordPress admin interface. The first thing you’ll see is a prompt with block patterns for different types of pages. They can work as a starting point and you can insert them with a click.
Alternatively, you can also start with a blank page.
Insert page elements
In WordPress, basic design elements are called “blocks”. For example, the editor automatically creates a paragraph block when you write something and press the enter key.
You find a list of all available blocks when you click the big “+” button in the top left corner.
They range from text elements and buttons to layout elements like columns and beyond. A click on any of them inserts it into the editor.
You also have access to more pre-designed collections of blocks in the Patterns tab. Inserting them works the same way.
You can also add blocks by clicking the small “+” button that appears when you place your cursor within the editor. Alternatively, type a forward slash (“/”) in any empty line followed by the block name.
Every element in the editor is customizable. Click it and you’ll find an options bar at the top and additional customization options in the Settings sidebar.
Use the editor to create must-have pages for your blog, such as:
About page
Contact page
Legal pages like a privacy policy
6. Add a menu
Including your new pages in a navigation menu allows your visitors to reach them easily. Sitewide changes like this happen in the Site Editor. Enter it via Appearance > Editor.
You’ll quickly notice that it works the same way as the Page Editor, only that there are more site elements you can work on. For example, your theme likely already has a navigation menu. In this example, it appears as part of the header.
There are different ways to customize it. One is via the Navigation menu. Another is through Patterns and Header. Thirdly, you can also click the header element in the main editing window and then choose Edit.
In all cases, the element you want to edit is the Navigation block. Opening the Document Overview menu helps you find it more easily. Once active, it lets you add and subtract menu items and other elements, rename them, and more.
While already in the Site Editor, you can also start to change the appearance of other parts of your blog.
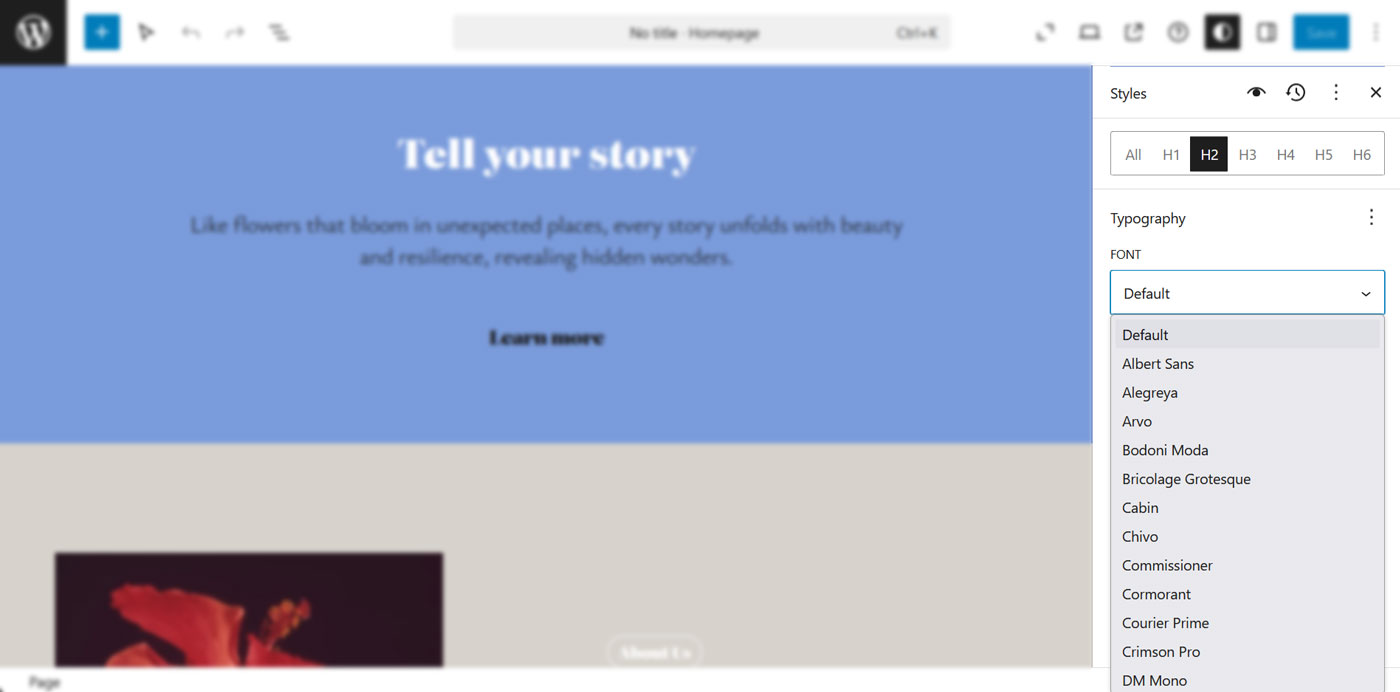
Change global styles
Changing global design options like fonts, colors, etc. happens in the Styles menu on the right side of the screen.
Among other things, it lets you change:
Style presets – Switch between style variations your theme ships with.
Typography – Make changes to the font family, size, appearance and more for all text on your blog, from body copy to links and headings.
Colors – Define custom colors, try out existing palettes, and change the color of text, backgrounds, links, and beyond.
Layout – Define content width, global padding, and spacing.
For example, if you go to Colors > Background, you can change the background color of your blog with a few clicks.
Customize page templates
Page templates work like blueprints for certain content types. If you modify a template, the changes apply to all pieces of content of that kind.
You can access them via the Templates menu when you click on the WordPress logo in the Site Editor.
One of the most decisive customizations you can make here is to determine how your posts appear on your blog page. Your theme most likely has a template called Blog Home for that.
Click to start editing it. Find the Query Loop block (again, use the Document Overview) and choose Replace.
This will show you available patterns for displaying the main blog.
Click whichever you like to see it on the page.
Customize it as needed. If you save now, your blog will adopt the new design.
8. Add blog categories
You should now have enough knowledge to customize the look of your blog. From here, it’s time to talk about how to create content, starting with categories.
Categories bring order to your blog posts and also clarify the topics of your blog to search engines. You manage them in Posts > Categories. Click the blue button to add a new category.
Provide a name and, optionally, a description that can show up in category archive pages. You’re also able to create sub-categories this way.
Think of categories as broad topics that your blog is about. For example, a food blog would have categories like Recipes, Cooking Tips, and Product Reviews and from there subcategories like Breakfast, Meal Prep, and Cookbooks.
Start with 3-5 categories. If you have more than that, your blog topic might lack focus.
Later, you assign categories in the Post Editor sidebar.
9. Develop a basic content strategy
In writing blog content, it helps to be strategic and develop a plan that will keep you on track.
The first step is to decide how often you want to publish a new post. This depends a lot on how much time you have available to invest. In the beginning, it’s more important to be consistent than to post often. Once a week or every other week is an okay goal to start with.
As for what to write about, you probably already have a few ideas for blog topics. Spend 10 minutes jotting down as many as you can.
After that, take another 10 minutes to score those ideas with numbers 1-3, the highest number being the best. Take your 3s and input them into tools like Google Keyword Planner, Semrush, or Ubersuggest. This will help you validate demand and also refine your exact key phrases.
Then add all those left over to your calendar.
10. Write your first blog post
If you’ve made it this far, it’s finally time–you are going to start creating your first blog post. This can be a bit overwhelming at first, so let’s break it down into manageable steps.
Create an outline
A blog post outline gives you an overview of the general content and structure of your blog post. Here’s an example:
It helps you determine the topic, angle, and main points. You can actually create it right in your WordPress blog. Go to the WordPress Post Editor (Posts > Add New Post) and open the Outline feature in the document overview.
This shows the heading structure of your future post. Use h2 headings to determine main sections, then h3 headings to further divide them, and so forth. You can also create a list of points you want to make in each section if you already know them.
Start researching
The research phase is where you collect all the raw information you will mention in your blog post and bring it into the right order.
This usually involves a lot of googling and reading the material that’s already out there. But you can also use books, your own expertise, or other sources.
You don’t need to write complete sentences here. Incomplete sentences and key phrases are enough.
Write a first draft
The main objective of your first draft is to turn your research notes into a cohesive text. This won’t be the final version and nobody else is going to see it, so shoot for volume rather than conciseness and speed over precision.
Seriously, you just want to vomit enough text onto the page that you have something to work with, so avoid sweating over specific sentences or editing while writing.
Edit and format
The editing phase is the most important part of the process. This is where you polish your draft, clarify your points, make sure the post progresses logically, and refine your writing. Besides research, this is where most of your effort should go and it often helps to do several rounds of editing.
Part of editing is formatting to ensure readability. Here are a few suggestions and best practices for that:
Include no more than 25 words per sentence
Use around three sentences per paragraph
Try to express one idea per paragraph
Keep sections short (under 300 words)
Use numbered and unnumbered lists
A great help is to input your content into the Hemingway App. On the Business plan and above, you can also install plugins like Yoast SEO and Rank Math that have a readability analysis.
Add visuals
Visual content breaks up text, makes it more interesting, and clarifies and emphasizes your points. It can take many different forms, such as:
Note that you can directly embed images from Openverse and Pexels via the Block Inserter’s Media tab.
Just search for a keyword and click when you find an image that you like to insert it.
Refine your headline
More people read your headline than will read the rest of your post, it can really make or break your article. To make sure it is the best it can be and get some practice, challenge yourself to write 25 of them.
If you are drawing a blank, feel free to plug it into your favorite AI tool for some input.
For example, Jetpack AI can also help you create a headline for your post.
In addition, you can use a free headline tool like Easy Peasy AI to further refine your ideas.
11. Optimize your post for SEO
The aforementioned SEO plugins also help you optimize your blog post for search engines. For one, they allow you to set custom page titles and meta descriptions.
These show up prominently in search results.
Customizing them makes sure they are engaging, inspire clicks, and don’t get cut off. You can also use Jetpack for this purpose.
SEO plugins additionally often come with content analysis models. When you input your main keyword, they tell you how well-optimized your post is.
An Important part that they will alert you to is using your keyword in your post slug, meaning the end of its URL.
It’s best if you make it concise, no more than 3-5 words. Ideally, it should just be the main key phrase.
You can also further customize the entire URL structure of your blog under Settings > Permalinks.
Including categories can help further clarify your blog topics to search engines but it’s not a must. Just be sure not to change the permalink structure of an established blog because it will neutralize established links in search engines and lead to 404 errors.
Finally, make sure to include internal links in your blog post to related blog articles and other relevant pages. It will help visitors discover more information and also helps spread SEO value throughout your entire site.
Besides SEO, additional promotion channels like social media and building an email list help you get your blog writing in front of more people.
All WordPress.com plans come with Jetpack, which you can find under Tools > Marketing > Connections. It allows you to automatically publish new blog content to selected social accounts.
You can also easily add social sharing buttons to your content using the Sharing Buttons block to make it easy for your readers to further spread the word.
In addition, WordPress.com has native functionality to build a newsletter. It allows you to collect subscribers, automatically send out new posts via email, schedule them ahead of time, and even monetize your newsletter.
You find options for that under Settings > Newsletter. It lets you offer different subscription options throughout your site and content. You can also set them up manually with the Subscribe block.
In addition, you customize the content and features of your emails as well as set up a welcome message to new subscribers. Detailed instructions in the documentation.
Make This the Year When You Start Your Blog!
Creating a blog, whether as a hobby, to build a personal brand, or to grow a business, is a rewarding experience. It allows you to share your passions with the world and claim your own spot on the web.
The process may seem overwhelming at first, but if you take it step by step, it’s both accessible and achievable for anyone willing to put in the effort. So, why wait? Bring your ideas to life, and start building something meaningful today. Launch your blog in just a few clicks on WordPress.com.
So, you are considering creating a personal website. Congratulations! In my opinion, that’s one of the smartest decisions you can make.
Building a website for yourself allows you to claim your own little part of the Internet. A space you fully control and that nobody can take away from you. Where you make the rules, determine the look and feel, and express yourself in any way you want.
If that sounds worth pursuing, this post covers everything you need to know. It will talk about the nature and benefits of a personal website, then give you step-by-step instructions on how to build one using WordPress. From picking a website address and basic design to creating pages, adjusting design elements like fonts and colors, and adding extra functionality—it’s all here.
A personal website is pretty much what it sounds like. It’s a website that belongs to you and allows you to represent who you are and what you do in whatever way you want.
You can control the design, content, functionality, and everything else about it.
Why would you want to build something like that for yourself?
Let’s talk about that for a minute.
Benefits of building your own website
Yes, there are other ways you can build a brand or profile online. For example, many people use social media as their main outlet. But, putting all your eggs into that particular basket is also risky.
There’s always a chance you can get banned or hit with an algorithm change that cuts your reach. Anybody who is old enough to remember when you could build an audience for your Facebook page without spending money on ads can tell you that much.
Or, just imagine, your favorite outlet gets bought by a person or company you don’t like and don’t want to support, so you feel compelled to start over on another platform. Sounds far-fetched, I know, but it could mean all your hard work is gone from one day to the next.
This can happen because you don’t actually own your social media account. The platform you are on does, including all the content you publish. And what’s not yours can be taken away from you.
In contrast to that, creating your own personal website, especially if you do it with a system like WordPress, means building something permanent. You fully own it and can take it with you wherever you want.
Plus, it allows you to do things that you can’t always do on social media, like:
Change the design
Publish detailed, long-form content
Sell goods and services
Tell people more about yourself
Get inbound traffic from search engines
Show off your portfolio
Build a central hub to consolidate all your online outlets
And much more…
Types of personal websites
So far, the definition of a personal website has been relatively broad. The reason for that is that it can take many forms depending on your purpose:
About Me website – Simply introduce yourself and who you are. It can work as an online resume, business card, or just a fun project.
Blog – If you are going the blogging route, you can dive deeply into a topic that interests you, grow a following, build expertise, and maybe even create a business.
Newsletter – You can also use a personal website to build a newsletter. This works well when combined with a blog. You can use content to attract an audience and then get them on the newsletter to stay in contact easily.
Portfolio – If you are an artist or any type of creative professional, a personal website is where you can show off your portfolio (also works for developers). It gives people an impression of what you can do and also allows them to get in touch with you directly, e.g. via a contact form.
Thankfully, as you will see below, the process of creating a personal website is also very flexible, so it can accommodate whatever you have in mind.
How to make a personal website
I’ve been building websites for more than ten years. If I were in your position and wanted to create a website for myself for the first time, here’s how I would do it.
1. Choose your hosting plan
Hosting basically means renting space on a computer that’s connected to the Internet. That’s where you save your website files so that others can access them with their browser.
With WordPress, you are free to choose your hosting provider since it runs on almost any server setup. WordPress.com is a great option because it’s managed hosting.
That means it takes care of a lot of the more technical parts of running a personal website, namely:
Installation – The website is automatically created for you. There’s no need to upload files to a server, create a database, or run an installation.
Ease of Use – Everything that has to do with managing the website happens in the same, beginner-friendly interface. You don’t need to switch back and forth between the hosting provider panel and the website; it’s all in the same place.
Speed – Performance is a very important topic for user experience. WordPress.com’s servers get the most out of the CMS and store copies of your website across 28+ data centers for super fast delivery.
Security – Jetpack is included on every WordPress.com site and provides daily security scans, automatic backups, brute-force protection, downtime monitoring, and more. Plus, you get encryption, firewalls, activity monitoring, DDoS protection, and automatic software updates with every plan.
While you can also implement the above manually, by choosing managed hosting, you can fully focus on the important parts of creating a personal website instead: its design, content, and growth.
If that sounds like the right choice for you, all you need to do is pick a WordPress.com plan.
The Personal and Premium plans are most suitable for simpler websites with fewer pages and for writing a blog. If you want to add extra functionality via plugins or even sell things on your personal site, Business or Commerce might be more your speed.
Each plan comes with unlimited visitors, posts, and pages. If you go for a yearly plan, you also get a free domain for one year. That brings us to the next point.
2. Pick a domain name
The domain name is what your visitors will type into their browser bar to reach your personal website.
An important aspect to pay attention to here is the domain ending or top-level domain (TLD). You know, the .com, .org, or .net part.
For example, if your site is for a particular country and language, it can make sense to use a country-specific domain ending like .de (for Germany) or .co.uk for the United Kingdom. Another example is that as a writer or artist, you could also use a .blog or .portfolio.
The main part of your domain, the name, is also important to think about. It should be easy to remember and convey trust. You can find more tips in this post and the video below.
Simply search for your desired name and hit enter. The tool will tell you if it’s available, the cost, and alternatives.
Select your choice and go through the purchasing process. As mentioned, if you host your website at WordPress.com, you get a free domain with an annual plan that can be automatically assigned to your site.
But don’t worry if you can’t make up your mind right now. You can skip this step in the beginning and settle on your domain name at a later time. Your website will live at a temporary address until then.
3. Select a theme
In WordPress, themes are what control the basic design. They are website blueprints that contain colors, fonts, layouts, and other design elements. As a consequence, you can alter your WordPress website’s look and feel—quite dramatically—by simply activating another theme.
Same website, different themes.
Another benefit is that there are themes specialized in building particular types of websites like restaurant sites, travel blogs, photography sites, and more. They come with features, layouts, and design elements specifically for these use cases, making getting started much easier.
In addition, themes are just starting points, not destinations. You can also still customize them completely later on as you’ll soon see.
Applying a theme to your personal website is super easy. You can check what’s available by going to the theme directory or Appearance > Themes in your WordPress.com admin interface.
Use the controls on top to search for a particular theme or filter by topics and plan. Click on any of them to learn more about it.
You’ll find a description and list of features as well as a preview on the right. Many themes come with style variations that apply different color schemes and fonts. You can try them out directly on this page.
In addition, you can see what your current website would look like with the new theme by clicking the Preview & Customize button. The editor that appears allows you to customize it further, e.g., try out style variations on your site.
You can save your changes and activate the theme immediately with a click on the button in the lower-left corner. Alternatively, do it from inside the theme menu.
4. Add a homepage and customize it
With the basic website in place, it’s time to learn how to create and customize pages, starting with your homepage.
Set up a new page
Navigate to Pages > Add New Page in your WordPress.com admin interface.
This will open the WordPress Page Editor. When creating a fresh page, you’ll be prompted with a collection of pre-defined layouts you can use to quickly populate it.
These layouts include categories such as About, Services, Contact, Blog, and more. If you find something you like, simply click it to insert the layout into the editor. Alternatively, you can start with a blank page and completely customize it yourself.
Add page elements
The WordPress Page Editor works with blocks, which are singular content elements of different types. For example, a paragraph block is automatically created when you write and press the Enter key. Other examples for blocks are:
Headings
Lists
Buttons
Images
Tables
Columns
Grids
You find a full list of available blocks when you click the big blue “+” button in the top left corner.
They are ordered by category, and you can also search for specific blocks. Clicking on any of them inserts it into the editor at the current position of your cursor.
In addition to individual blocks, the Patterns tab offers pre-designed collections of blocks, such as contact forms, galleries, team member sections, newsletter sign-ups, and more. These patterns can help you quickly create layouts without having to build everything from scratch. You insert them the same way.
Another method to add blocks is by clicking the small “+” button that appears when you place your cursor within the editor. It lets you search for a block by name and click it to insert.
Even easier, type a forward slash (“/”) in any empty line, start typing the block name, and select it using your mouse or keyboard.
To understand and manage the structure of your page, use the Document Overview tool in the top left corner.
Customize blocks
Clicking on a block brings up an options bar at the top and additional customization settings in the sidebar.
The options vary depending on the block type. For instance:
A paragraph block lets you adjust font size, color, text alignment, and more.
A button block allows you to customize alignment, style, color, dimensions, and shadows.
It takes some trying out to know what you can change for which type of block.
Be aware that these settings apply only to the specific block on the current page. For global design changes—like applying a new font to all headings—you’ll need to use the global Styles settings, covered later.
Once you’ve designed your homepage to your liking, save your changes and publish the page.
Set it as your front page
To make your newly created page your homepage, go to Settings > Reading in the WordPress.com admin dashboard. At the top, you’ll see two drop-down menus that allow you to define which page serves as your homepage and which one displays your blog posts.
Select your new page under Your homepage displays and save the settings.
Your homepage is now live! For more information about pages in general, check the documentation.
5. Add more pages and a menu
You can use the same workflow as above to create additional must-have pages for your personal website, such as:
About page
Contact page
Services
After that, you’ll likely want to include them in a navigation menu so that your visitors can reach them easily.
Sitewide changes like this happen in the Site Editor. You can access it via Appearance > Editor. The Site Editor works similarly to the Page Editor but allows you to edit additional parts of your website.
In many cases, your theme already includes a navigation menu. In our example, it appears as part of the header. One way to edit it is to click Patterns and Header, though you might need to know the name of your header pattern to pick the right one.
Alternatively, click the header element in the main editing window and then choose Edit.
Either gets you to the editor below.
Here, select the Navigation block (again, Document Overview is your friend).
You can then add and subtract menu items and other elements, rename them, and also change some design options in the sidebar.
Make adjustments as needed, then save to make them appear on your website.
Note: In some themes you control menus in the Site Customizer instead. You can find more information here.
6. Customize fonts and colors
The Site Editor is also where you can make global design changes for your website. You’ll find these options in the Styles menu in the top right corner of the editor.
Here’s what you can change:
Browse styles – Switch between style variations, color palettes, and font combinations your theme ships with.
Typography – Make changes to the font family, size, appearance, line height, letter spacing, and more for body text, links, headings, buttons, and other text elements on your site. You can also change font size presets here.
Colors – Add colors and gradients to use in the editor, try out existing color palettes, and customize colors for text, backgrounds, links, buttons, headings, and more.
Background – Give your website a background image.
Shadows – Set up presets for drop shadows to use them in the editor.
Layout – Define basic layout settings such as content width, global padding, and block spacing.
Blocks – Make design changes to particular block types that apply sitewide.
A cool feature to preview changes in real-time, is the Style Book option in the Styles menu. It provides an overview of how your site’s design elements will look.
Let’s go over some use cases to help you understand all of this information
Change heading fonts
You change the font of your headings under Typography and then Headings. To make things easier, open the Text tab in the Style book to see all headings at once.
Pick which heading type to customize, then apply your changes. For example, if you want to prevent your H1 headings from turning into all caps, choose the “H1” option, then set Letter Case to None.
To change the background color of your website, go to Colors and then click Background.
Pick from the theme palette (you can choose a different one at top) or define a custom hue. That’s it.
Modify button shadow
To make changes to a single block, click Blocks.
Either scroll to the button block in the list or use the search functionality to find it. Click it.
Find the Border & Shadow option at the bottom. A click on Drop shadow allows you to apply different kinds of shadow effects to all of your buttons.
7. Edit page templates
Templates define the design and layout for certain content types across your website. To access them while in the Site Editor, click on the WordPress logo and then Templates.
You’ll see a list of all existing templates on your site such as single posts, pages, and archives. For example, you might want to adjust the layout of your blog posts. For that, click the Single Posts template, to start editing it.
Let’s say your goal is to switch the position of the post meta to appear under the title.
For that, simply choose the post-meta block and move it up.
When you now save, the changes apply to all blog posts on your website.
Plugins let you change and enhance the functionality of your personal website. If you are on a Business or Commerce plan, you can install them in the Plugins menu.
Plugins cover a wide range of features that they can contribute to your website, such as:
Improve search engine optimization (SEO)
Add an Instagram feed
Limit login attempts
Accept payments with different providers
Connect your website to Google Analytics
You can find plugins by using the search functionality at the top or browsing through categories. To learn more about a plugin, click on it. If you like what you see, click the big Install and Activate button.
Once the installation is finished, you can start using the plugin’s functionality right away.
Your personal website is your own piece of online real estate. It’s yours to do with as you please and, unlike other online profiles, can’t be taken from you.
Designing and developing websites is complex. User expectations rise alongside advancements in what is technically possible. As a consequence, the process has many moving parts you must keep in mind if you want to design and build web presences that provide a great user experience, rank well in search engines, and achieve client goals.
Even as an experienced freelance or agency developer, you might struggle to remember every item on the to-do list. The good news is, you don’t have to. By establishing a formalized web design process, you can create a roadmap to follow each time you build a new website.
Doing all the thinking beforehand ensures that you don’t forget anything crucial. It also frees up headspace for doing the actual work, avoids overwhelm, improves efficiency, and allows you to build better websites on repeat.
In this post, we’ll help you reap those benefits by establishing your own web design process. We’ll go through all the necessary steps and give you actionable advice on how to implement each and every one of them. This will give you a foundation to develop your own workflow and make life easier in the future.
How to use this information to develop your own process
We’ll go over the following steps (you can click on the links to jump directly to the part that most interests you):
Goal-setting
Scoping
Resourcing
Project management
Sitemap / wireframes
Copy / content creation
Staging site setup
Visual design
Testing
Launch
Site maintenance
Our goal is to cover each point as completely as possible to provide you with a blueprint for developing your own process. Take what’s useful and relevant to you and add any additional information you might need for your particular use cases, working style, industry, or else.
Be aware that a formalized web design process is a living document that you’ll likely change over time as you repeatedly go through it and as web design requirements change. That way, it always reflects your latest way of working and current level of technology.
To make getting started extra easy, we also created a customizable checklist template. To use it, just create a copy and adapt it to your needs as you go through the information below.
1. Determine website goals
The first thing you need is background information on the website you are about to build. The main objective is to understand its purpose, as this lays the groundwork for many decisions down the line.
For that, your first task is to understand who your client is. Their type of organization, industry, and audience make a big difference in the end product. Good questions to ask are:
What exactly does your business do?
What are the company’s vision, mission, and/or values?
How do you differ from the competition?
Which problems do you solve for your customers?
Which challenges, opportunities, and trends are shaping your industry?
What regulations or compliance requirements does your industry have?
Is there an existing brand identity?
Once you have a better picture of the client, the second step is to find out how the website fits into their business. This is a set of questions that will help you do so:
What’s the goal you hope to achieve with the site?
Who is the intended audience? What’s the first impression they should have when entering the website and what actions should they take on it?
What type of content are you planning to publish?
What are must-have features and functionality?
How should the site be different or the same as that of competitors?
What’s the budget and timeline?
Questions like this are important for several reasons. First of all, lots of industries have distinct conventions when it comes to website design. For example, you would use a very different color scheme for a children’s toy store compared to a corporate financial services website. The client might also already have existing branding that you have to take into account to preserve an established look and hit the right tone.
In addition, the type of site you will build also has a big influence on the web design process. A brochure website, blog, and online shop all have very different purposes and require unique approaches. There can even be legal requirements that you have to meet. For example, on real-estate websites, visitors might have to virtually sign a contract before they can view portfolio items.
Without being crystal clear about what you are making and for what purpose, you are almost certain to get off on the wrong foot, which can be costly and time-consuming to correct. Therefore, spend enough time on the discovery phase until you have a firm grasp of the client’s needs. Extensive contact with stakeholders, market research, audience personas, a design brief, and competitor analysis are all useful tools for this stage.
2. Scope the project
Once you know what you are tasked with designing, the next step in the web design process is to put together the project scope. This is where you determine the exact functionality and technical requirements for the site. It also helps you estimate how long the process will take, allowing you to agree on the exact work to be done (to prevent scope creep) as well as deadlines and milestones with your client.
Ask your client for these basic pieces of information:
How many pages does the site need?
What will they contain? Do you have to account for things like forms or e-commerce functionality?
What other features will be on the site?
What about content? Will the client provide it, or is that part of your duties?
Once you have collected key information, you can estimate how long the total project will take. Be sure to build in some buffer for when, not if, something unexpected happens.
A very useful tool for visualizing the timeline is a Gantt chart.
It shows the project timeline, key deliverables, and their expected completion times. You can easily create Gantt charts using existing Excel or Google Sheets templates.
3. Identify and allocate resources
After this, it’s time to deal with your resources, including money, workforce, and tools. Let’s go over them one by one.
An established scope makes it easier to calculate project costs. For example, it helps you see how many hours it will take and calculate the cost of labor. However, don’t just think about the time—also consider external costs, such as:
Be sure to calculate these beforehand for yourself and to provide an accurate estimate to your client. We have a checklist for website costs if you need a refresher. For hosting options, consider:
If you need a free tool for local development, check out Studio.
Another part of resourcing is determining who will do the work. If you’re a freelance full-stack developer, you might handle everything yourself. If you’re part of an agency, the work will likely be divided between the design and development teams. Either way, ensure there’s a clear plan and everyone knows what’s expected of them.
4. Prepare your project management platform
By now, you should have a good overview of the work that awaits you. It’s time to put it into order and make it more manageable.
The first step is to list all the phases and tasks the project will go through and add them to a project management tool. This also allows you to bring them into the correct order. Recommended tools include:
As mentioned earlier, you can also use the free checklist template included in this article.
Feel free to break the phases down into smaller chunks if that’s how you prefer to work. In addition, include all the resources you already have and attach them to their respective tasks. While you are at it, don’t forget to input the timings and milestones you determined earlier for each item. This will help you stay organized.
By the way, your planning should also include regular check-ins with clients for approvals and updates. This fosters collaboration and ensures everyone stays on the same page.
5. Create a sitemap and wireframes
From here, it’s time to start conceptualizing the end product and create a plan to follow along.
You’ve already determined the must-have pages for the website in the project scope. These often include the usual suspects (homepage, about page, contact page, legal pages, etc.), but you might also have less common ones depending on the project. The next step is to put them into relation to each other and plan the site structure. You can do so with a basic sitemap.
The way pages are arranged greatly influences a website’s navigation and user experience. For example, it determines how easy it is to find content and how often visitors have to click to reach it. A good structure also makes the site more crawlable, giving it an SEO boost.
Part of the site structure are also navigation and menus. They point out important pages and are often an initial entry point for visitors, so it’s important to consider them as well as other navigation elements like breadcrumbs.
Once you have the overall structure, the next task is to visualize individual pages. This is where you create layouts for each page and determine how elements will be arranged—a process also known as wireframing.
Wireframes let you map out the page structure before dealing with design considerations. They help you focus purely on usability and are a great tool to collect feedback from clients. Be sure to also map out your mobile layouts!
You can create wireframes using a variety of tools:
Graph paper – Go old school with pen and paper.
Google Docs – While not the best option, it still works. Tables are your friend.
Professional design tools – Options include Balsamiq or Figma. If you use Figma, consider using a wireframing kit like Johannes WP, which is specifically made for wireframing WordPress websites.
With the concept finished, you can start creating the visual parts of the website. Ideally, this doesn’t start with colors, fonts, and CSS but rather with written content.
While this might seem backward, it actually makes a lot of sense. Design should follow content, not the other way around. You don’t want to find yourself in a situation where you have a finished design but it can’t accommodate the intended text.
Writing copy doesn’t just mean crafting text for the main sections of the page wireframes you created earlier but also for navigational elements, buttons, forms, and other page elements.
There are several ways to handle this step:
Receive the content from the client
Draft the copy yourself (if that’s part of your agreement)
It’s important to be a bit flexible here. Content might still change and not everything has to be fully ready. It’s fine to use placeholders for some parts, like product descriptions.
However, you want at least a rough idea of what you need to accommodate in your page designs before you start creating them. This saves you from having to make time-consuming changes later.
7. Set up a staging site
Now that you’re ready to work on the actual website, it’s crucial to set up a development version. As a professional web developer, you know better than to do the design process on a live domain.
Once that’s ready, you can immediately start creating the raw structure of the site. This includes setting up all the pages you scoped earlier and creating navigation items pointing to them.
While you’re at it, you can also install any plugins included in your scope, implement features like forms, and insert written content into the appropriate places to create a rough version of the site.
8. Create the visual design
The next step is visual design. This is where you implement the structure from your wireframes and make it look good with fonts, colors, and other elements that create the website’s aesthetic.
This part of the process often happens in two phases: first creating a design mockup and then implementing it. In a WordPress website, the central element for that is the theme, which controls the website’s design.
Here, you can either go with an existing theme or create your own. If you have a WordPress.com Business plan, either is an option since you can upload any third-party theme you want.
Obviously, making a theme from scratch is more work though it gives you the possibility to create a bespoke solution. Going with an existing theme takes less effort, yet it might not have all the features you want or need.
The most time-friendly solution is often to take a hybrid approach. That means finding a theme that is very close to what you are looking for in terms of design and functionality, and then customize it according to your needs.
Thanks to block themes and the WordPress Site Editor, this has become simpler than ever. For example, you can adapt visual elements like colors easily using Styles and/or the WordPress Customizer.
In addition, the Site Editor gives you control over all typography available on your website. You can assign a multitude of fonts to any text elements on your website.
Finally, your website will likely also include visual page content, such as photos, icons, graphics, or videos. Depending on your contract, these might either come from the client or be something you create. Be aware that you have the possibility to source free images directly inside the WordPress.com editor.
First, there is the Jetpack AI image creator. Simply insert an Image block and choose Generate with AI.
Then, input your prompt in the panel that shows up.
You can also insert images from Openverse and Pexels.com by clicking the Block inserter button and choosing the Media tab.
Search for any image and click on a result you like to automatically add it to the editor, complete with the correct attribution.
9. Test the website thoroughly
Already done with the design? Alright hot shot, let’s move on then. Now it’s time to get to testing, which is one of the most crucial stages of the web design process. You don’t want to launch a website only to find parts or even the entire site not functioning correctly.
Testing should ideally happen on a staging site, especially one that uses the same environment as the eventual live website. This allows you to spot potential conflicts or problems that didn’t surface during development.
Here are the most important things to examine each page for:
Double check the content – Content is the main attraction of any website. Go through all pages to ensure there are no typos, missing images, or other errors that detract from the user experience.
Ensure all features work – Test all central functionality, such as web forms, shopping carts, and interactive elements. For example, see that form submissions reach the intended destination.
Verify all links – A well-planned site structure is only effective if users can actually use it. Make sure that links go to the correct destinations and are not broken. A tool like Screaming Frog lets you scan for broken links in bulk.
Check SEO – Make sure all pages have correct meta information, such as title tags and meta descriptions. Screaming Frog also allows you to scan for that.
Measure speed – Page speed is a major usability and ranking factor. Run all pages through tools like PageSpeed Insights to identify performance bottlenecks and fix them. You can also use WordPress.com’s free Site Profiler tool.
Test on different devices and browsers – Since most users access websites on mobile devices, ensure the site looks good on all screen sizes. Test the site on multiple browsers as well.
Validate accessibility – Modern web design must meet accessibility standards, such as WCAG guidelines. Check for sufficient color contrast, keyboard navigation, and compatibility with assistive technologies using tools like Lighthouse (which is also part of PageSpeed Insights) or WAVE.
Invite your clients or other stakeholders to get involved in testing as well. Fresh eyes can catch issues you might have missed. Plus, you’ll need client sign-off on the website before launching. User testing is also a possibility at this stage.
10. Launch
With testing complete and any problems resolved, it’s time to publish the website. Here, too, having a detailed launch checklist can be extremely helpful to ensure you don’t overlook anything.
After all, there are important things to do, such as connecting Google Analytics and Search Console, setting up security measures, creating user accounts, and configuring backups.
When you set a launch date, be sure that any promotional efforts, such as social media updates and email campaigns, are prepared in advance. This coordination ensures that your website makes a big splash as soon as it goes live.
11. Do regular site maintenance
While the website design process is mostly done after launch, it doesn’t mean your work is over. Websites are ongoing projects that require regular maintenance to stay functional, secure, and effective.
Here are some common maintenance tasks:
Addressing smaller bugs
Publishing and updating content
Creating new pages
Building traffic
Performing software updates
Conducting security audits
Running backups
Measuring KPIs through analytics
Smart developers have a plan for maintenance to continue creating value for clients—and revenue for themselves.
Of course, it’s best to automate as much of this work as possible. For example, WordPress.com automatically handles backups and updates, so you don’t have to do them manually or set up a separate solution.
You can find a full list of recommended maintenance tasks in this article.
Stay on top of things with your own web design process
Creating a website that meets today’s high standards for design, usability, and performance is no small feat. With countless moving parts to manage, having a structured web design process is essential to stay on track.
By following a plan beforehand, you can save time, reduce errors, and ensure that nothing important gets overlooked. It allows you to focus on delivering results that align with your client’s goals while making your workflow repeatable for future projects. The steps outlined in this article serve as a flexible foundation to help you put together a process that works for you.
Now it’s your turn: What strategies or tools have helped you master the web design process? Share your thoughts in the comments below!